AiSeattle 2012 Fashion Show Backgrounds
I did all of the background imagery for the 2012 AiSeattle Fashion Show, constructing seven environments in Maya and 3ds Max. Each one was a looping movie in a space, with the theme and colors chosen to match the collection being shown. All designs are my own, with all textures hand painted in Photoshop and Illustrator. Compositing was done in Fusion, Nuke, and After Effects.
AN380 Spring 2011 Midterm Reconstruction
This class focuses on creating and rendering highly realistic lighting and materials in mental ray. Additionally, in tandem with the rendering, students are introduced to professional grade compositing tools and workflow. The images shown below are renderings from my reconstruction of the midterm taken in class on 5/2/2011. The class had four hours to render two final images from the scene I provided, in two different lighting setups. The first lighting setup specified was to light the room from the practical sources, and then overlay low sunbeams to simulate a late afternoon or sunset condition. The second lighting setup specified was to light the room using Sky Portals, which focus the soft indirect light from outside in through controlled openings such as windows. For both images, students were instructed to render ambient occlusion imagery, as well as any other composite passes they saw fit. The sunbeam setup also required a separate parti volume pass to add the dust in the light beams. Students then had to composite their render passes in Eyeon Fusion, adding depth of field, color correction, glow, and any other effects deemed necessary. Grades were based solely on final sumitted images; students were free to use any methods or resources to help produce the renderings.
AN380 Advanced Lighting Techniques
Midterm reconstruction examples
This class focuses on creating and rendering highly realistic lighting and materials in mental ray. Additionally, in tandem with the rendering, students are introduced to professional grade compositing tools and workflow. The images shown below are renderings from my reconstruction of the midterm taken in class on 2/9/2011. The class had four hours to render two final images from the scene I provided, in two different lighting setups. The first lighting setup specified was to light the room from the practical sources, and then overlay low sunbeams to simulate a late afternoon or sunset condition. The second lighting setup specified was to light the room using Sky Portals, which focus the soft indirect light from outside in through controlled openings such as windows. For both images, students were instructed to render ambient occlusion imagery, as well as any other composite passes they saw fit. The sunbeam setup also required a separate parti volume pass to add the dust in the light beams. Compositing was to be done in any package that the students saw fit to use; we have available Adobe After Effects, Eyeon Fusion, and Autodesk Composite.
My reconstruction of these images took the following times:
Interior lighting: 45 minutes (including parti volume rendering)
Sky Portals: 55 minutes (including ambient occlusion rendering)
Compositing: 20 minutes (including both Fusion and Composite work)
Total: 120 minutes, or 2 hours.
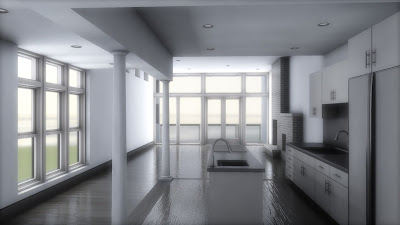
Sky Portal - Composite
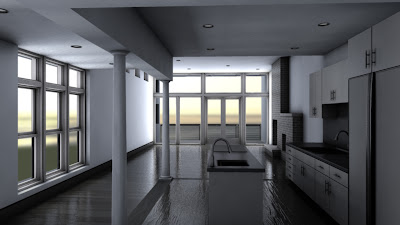
Sky Portal - Fusion
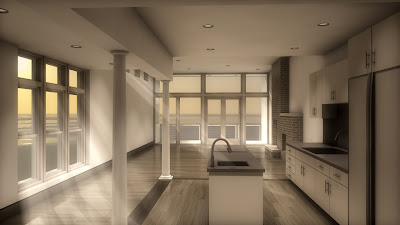
Interior lighting - Composite
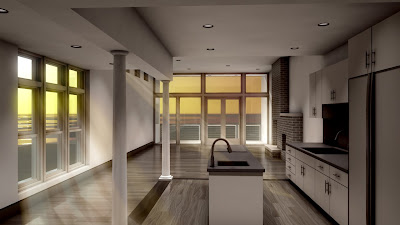
Interior lighting - Fusion
Midterm reconstruction examples
This class focuses on creating and rendering highly realistic lighting and materials in mental ray. Additionally, in tandem with the rendering, students are introduced to professional grade compositing tools and workflow. The images shown below are renderings from my reconstruction of the midterm taken in class on 2/9/2011. The class had four hours to render two final images from the scene I provided, in two different lighting setups. The first lighting setup specified was to light the room from the practical sources, and then overlay low sunbeams to simulate a late afternoon or sunset condition. The second lighting setup specified was to light the room using Sky Portals, which focus the soft indirect light from outside in through controlled openings such as windows. For both images, students were instructed to render ambient occlusion imagery, as well as any other composite passes they saw fit. The sunbeam setup also required a separate parti volume pass to add the dust in the light beams. Compositing was to be done in any package that the students saw fit to use; we have available Adobe After Effects, Eyeon Fusion, and Autodesk Composite.
My reconstruction of these images took the following times:
Interior lighting: 45 minutes (including parti volume rendering)
Sky Portals: 55 minutes (including ambient occlusion rendering)
Compositing: 20 minutes (including both Fusion and Composite work)
Total: 120 minutes, or 2 hours.

Sky Portal - Composite

Sky Portal - Fusion

Interior lighting - Composite

Interior lighting - Fusion
Speaking at Autodesk University 2010-
I will be giving a lecture at Autodesk University 2010 in Las Vegas at the end of November, on Design Visualization in Maya. I am quite honored to be doing this, as there are only a few hundred slots open for several thousand submissions. I will be covering precision modeling and texturing, realistic materials, and an overview of Mental Ray light and materials... and maybe a little bit of compositing in Toxik if I can. http://au.autodesk.com/
I will be giving a lecture at Autodesk University 2010 in Las Vegas at the end of November, on Design Visualization in Maya. I am quite honored to be doing this, as there are only a few hundred slots open for several thousand submissions. I will be covering precision modeling and texturing, realistic materials, and an overview of Mental Ray light and materials... and maybe a little bit of compositing in Toxik if I can. http://au.autodesk.com/
Work in progress-
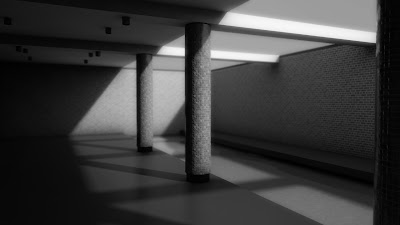
I have been teaching myself Eyeon Fusion as we are rumored to be getting it at school next quarter. Another node-based workflow has been easy to get up and running in, barring the usual hunting for equivalent tools from Nuke and Composite. The image below is a test of a model I use for, well, testing of things like this. I was trying to approximate the look of some of my favorite Julius Shulman photography such as the Santa Fe Savings and Loan.
I have been teaching myself Eyeon Fusion as we are rumored to be getting it at school next quarter. Another node-based workflow has been easy to get up and running in, barring the usual hunting for equivalent tools from Nuke and Composite. The image below is a test of a model I use for, well, testing of things like this. I was trying to approximate the look of some of my favorite Julius Shulman photography such as the Santa Fe Savings and Loan.

3D Portfolio
Gallery created for a lecture given at the University of Oklahoma, set in a historic structure in Guthrie, Oklahoma.

Tools used: Autodesk 3ds Max, Autodesk Combustion, Adobe Photoshop, rendered in Mental Ray.
Retail store featured in my book, Achieving Invisibility: The Art of Architectural Visualization in 3ds Max.

Tools used: Autodesk 3ds Max, Autodesk Combustion, Adobe Photoshop, rendered in Mental Ray.
GOAT Clothing store, Newport Beach, California. Design visualization rendered for Victor J. Michael Interior Design.
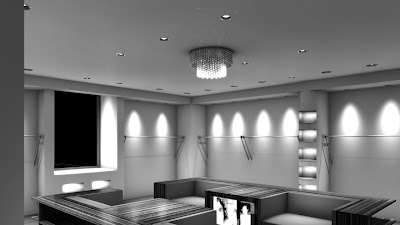
Tools used: Autodesk 3ds Max, Autodesk Combustion, Adobe Photoshop, rendered in Mental Ray.
Carlsbad Estates, Model 3B, design visualization for the Miriam Tate Company.
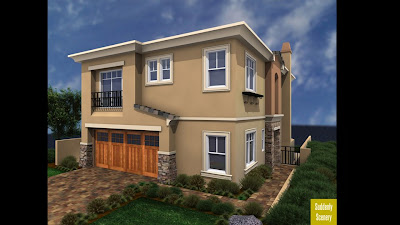
Tools used: Autodesk 3ds Max, Autodesk Combustion, Adobe Photoshop, rendered in Mental Ray.
Catacombs, from a lecture given at the World Cyber Games Conference 2007, on lighting for mood.
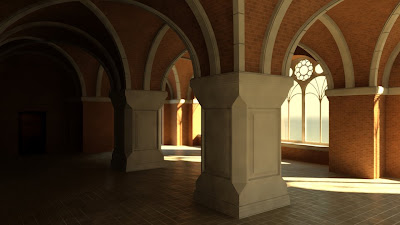
Tools used: Autodesk 3ds Max, Autodesk Combustion, Adobe Photoshop, rendered in Mental Ray.
Illustrated Elevations
Subscribe to:
Comments (Atom)


